Perfect Pie Crust
Let me start off by saying I am a bit of a pie snob. I didn’t realize this until I left my parent’s home and realized all pie crusts were not created equal. After leaving my childhood home I begged my mom to let me in on her famous pie making secrets. What it comes down to is using the perfect recipe, with the right mixing technique. It can truly make or break a pie, so trust me when I say, pass on the store bought pie crust, and use this one.
And now presenting, my Mom, Penny…

Hello, all of you holiday cooks out there! I am excited to share what I think is the very best pie crust recipe out there. I have tried lots of recipes, and this one has become my go-to pie crust. It is flaky, delicious, and a great compliment to whatever filling is inside.
There is no such thing as a low-calorie pie crust.
If you find one, I can tell you without tasting it that it doesn’t taste good. So quit fussing around trying to find one that will save you ten or twenty calories. It isn’t worth it. The secret ingredient in this recipe is butter flavored Crisco. Use it. It’s okay to splurge a little around the holidays!

The ingredients are pretty basic, and nothing fancy.
It’s all in how it is put together, so pay attention to the pictures.
Ingredients:
6 cups of flour (I use all-purpose)
3 cups of butter flavored Crisco (No other kind of shortening works as well)
3 tsp. Salt
1 to 1 1/3 cups water
For me, this makes three double pies or six single-shell pies.
For the holidays, I will make this many pies. But when I don’t make that many at a time, I still make the big recipe and stick the remainder in individual freezer bags. I can thaw out a bag whenever making a pie strikes my fancy. If you don’t want to make this many, the ratio is as follows:
2 cups of flour (I use all-purpose)
1 cup of Butter Flavored Crisco (No other kind of shortening works as well)
1 tsp Salt
1/3 to not quite ½ cup of water
This will make one double crust pie or two single shell pies.
—
Directions:
Assuming you are doing the big batch, you will need a LARGE bowl. Get the biggest one you have.
Measure out the flour into the bowl first.
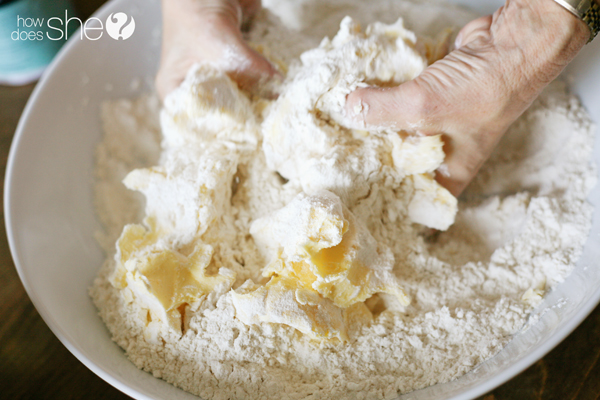
Then plop the shortening on top of the flour.
Then sprinkle the salt all around
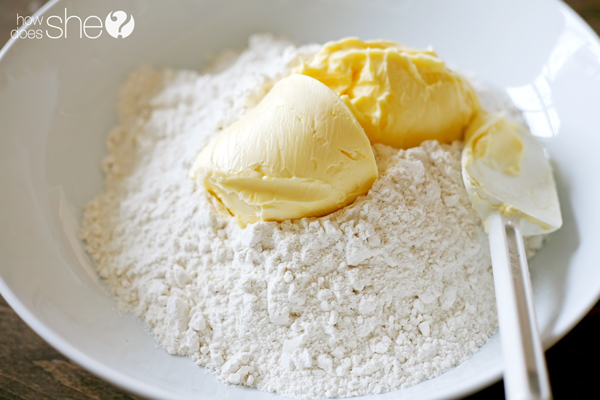
DO NOT put the water in yet!
Now go take off your rings and wash your hands. This next part is the most important, and the key to a delicious, flaky pie crust!
You will use your fingers to very delicately sift the shortening and flour mixture together.
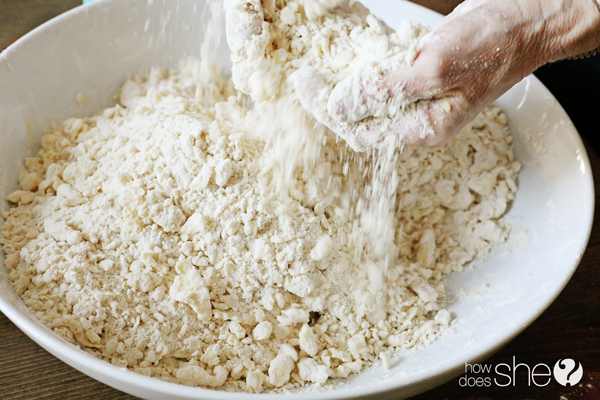
Gently break up the shortening into a few separate chunks. Scoop your hands deep into the flour. With a very light touch, wiggle your thumbs and fingers back and forth to break the shortening into the flour. DON’T SMASH the ingredients together. The goal is to get the whole mixture into pea-sized chunks. Quit sifting as soon as you get there.
Over-mixing will cause a tough crust. Yuck!
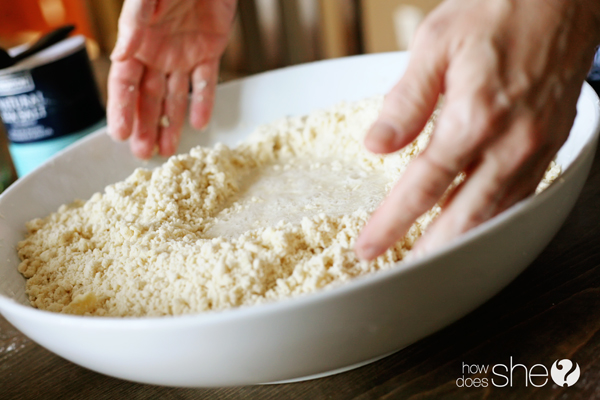
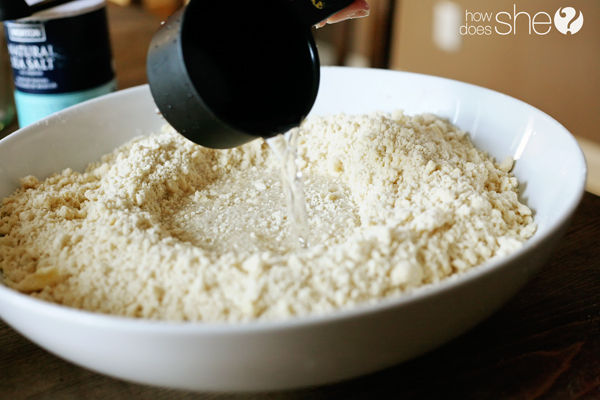
At this point, start with the lesser amount of water, and sprinkle it on top of the mixture. Gently lift and mix until it is all sticking together. It’s okay to do a little smashing together now.
If it is not sticking together, go ahead and put in a little more water until it is adhering well. (I usually end up adding the greater amount of water. It all depends on the moisture content of your flour and your air.)
Dividing the dough:
If you are using the full recipe, you can break it up into six equal balls. Then roll out your crusts as needed. If you don’t want to make that many pies, just put each ball into a freezer bag, and freeze it ‘til you need it.
Rolling it out:
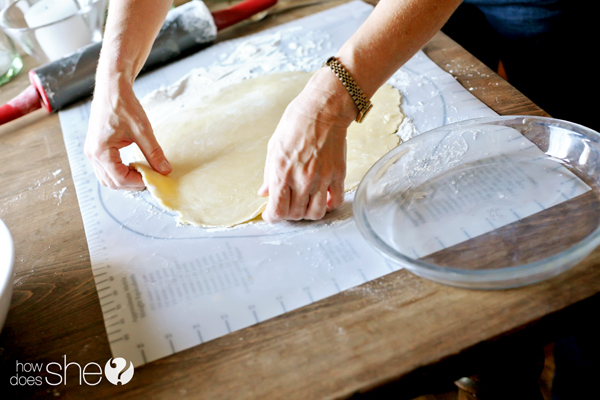
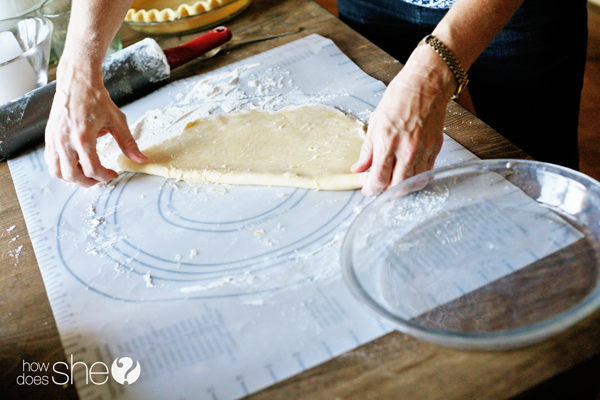
I like using a pastry mat to roll out my crusts, but it isn’t necessary. Sprinkle a little flour on your rolling surface and your rolling pin. Put your ball of dough in the center and slightly flatten it with your hand. With medium pressure, roll evenly away from you two or three times, then roll from one side to another. This starts to stretch out your dough. It won’t be perfect, so don’t fret. Gently pull your dough off of the surface, re-flour the surface, and flip the dough to the opposite side.
Now repeat the process, going one direction (not back and forth) and shaping it into a circle. You can flip it from one side to the other to keep it from sticking to the surface, I always do. I like to get my crust as thin as I can without it getting holes in it or breaking apart. You can always add a little extra dough in the holes to refill them. For a 9″ pie try to roll it about 11 1/2″ in diameter. 
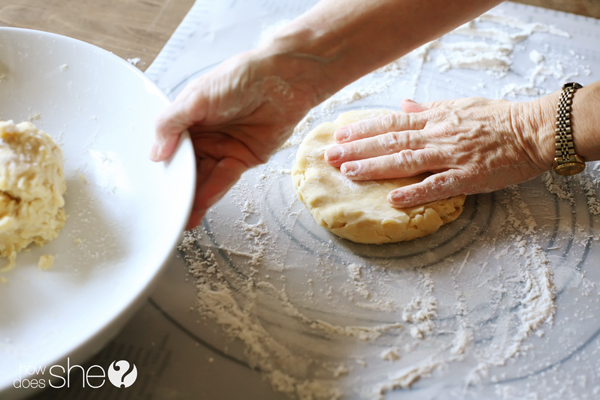

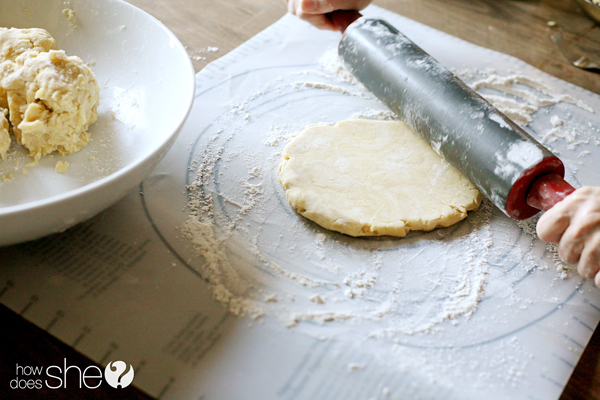

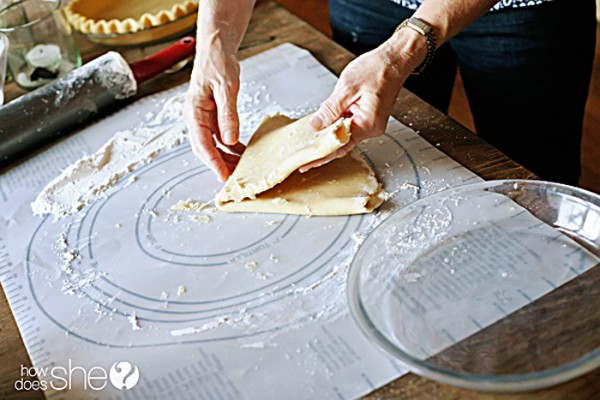
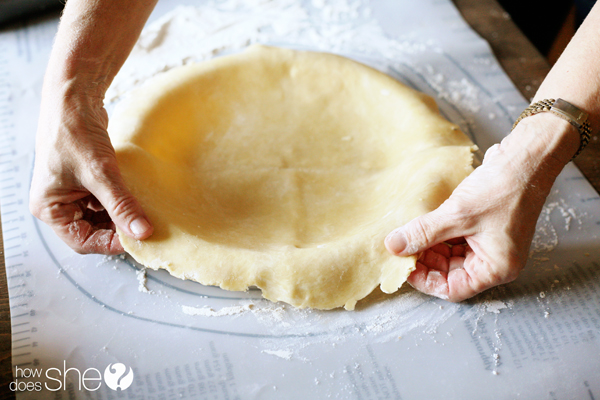
When your dough is the right size, dust it with a tiny bit of flour, gently fold it in half, and then in fourths. It makes it easy to lift off the mat and put the point into the middle of your pie plate. Then you can unfold it and it will be perfectly centered.
Placing the dough:
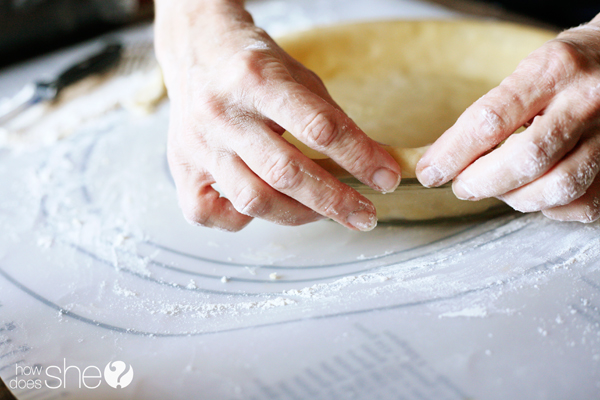
Gently (how many times have I said gently?) press the pie to the shape of the pan, making sure that it is pressed into the edges.
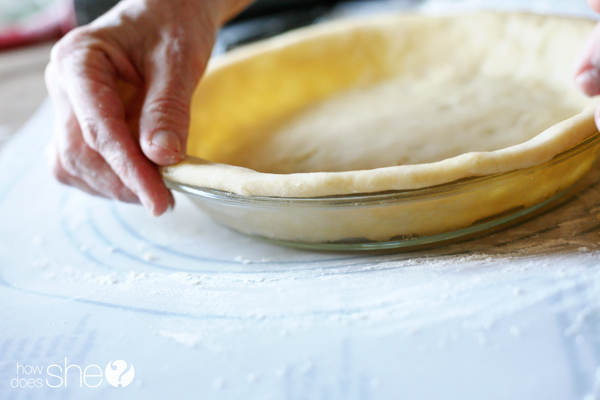
You should have a good amount of dough hanging over the edge.
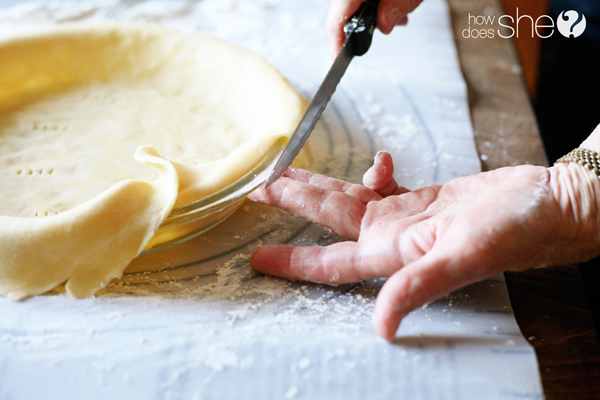
Putting my hand underneath the edge of the crust, I put my fingertip against the edge of the pan. I then cut the crust to the length of my first knuckle. (If that doesn’t make any sense, then look at the picture – you will see what I mean!) Turn the pie pan away from you and cut around. Soon you will have a perfect circle.
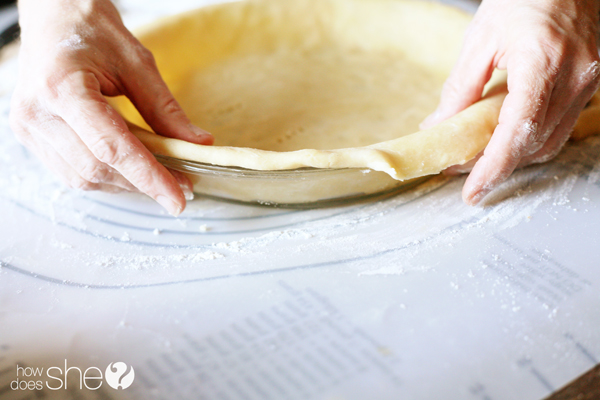
The next step is to fold the edge of the dough underneath, thus doubling the thickness of the dough on the edge of the pan. Slightly flatten the edge with your hand.
The edge is a fun place to practice your creativity!
Just flattening it with a fork all the way around is super easy. If you want, you can then use a finger to push the crust in every inch or so for a little scallop.
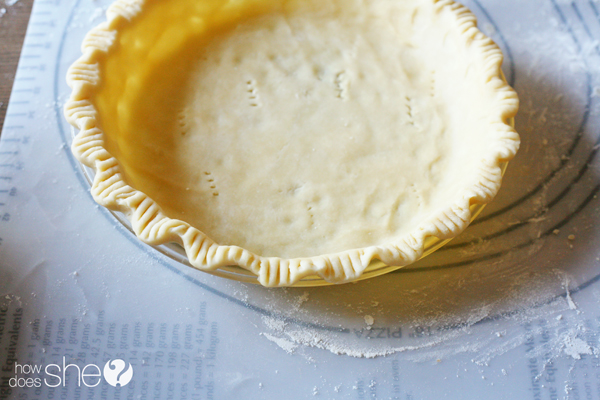
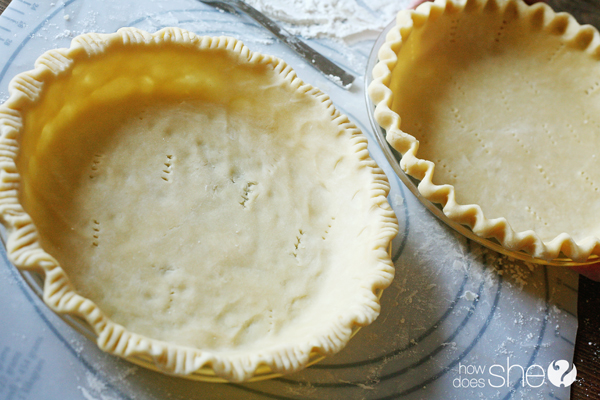
The one that I like the most is the way my mom always made pies when I was a little girl. I call it the zigzag edge. With your thumb and index finger of your left hand spread out about 3/4″ apart, on the inside of the pie edge, use your right index finger to push the dough in between your left fingers to make the zig. Now move your left thumb into the position your index finger was in previously. Push the dough with your right index finger into the next space for the zag. Keep going all the way around the pie crust.
Now isn’t that pretty? Everyone will be so impressed!
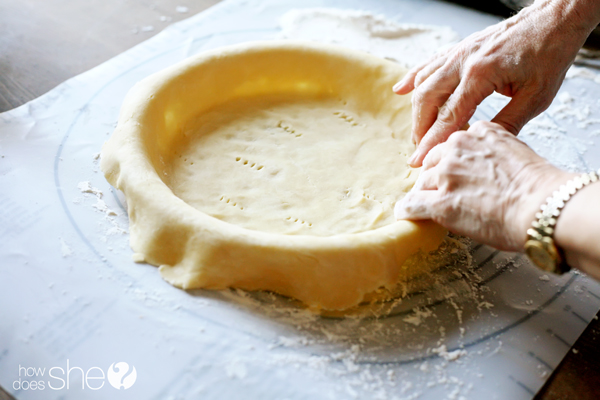
Using a fork, go all around the inside of the pie poking holes every inch or two so that the pie crust doesn’t bubble up while it is cooking.
—
Your crust is now ready to fill with your favorite filling. Or just bake the shell to fill later.
The next trick is all in how you bake it!
For double-crusted fruit pies: Put a little milk on the top crust and sprinkle dry sugar on top of that.
For Meat pies: Use milk and sprinkle on salt.
I always bake my pies on the lowest rack in the oven. Bake at 400 degrees for 35 minutes or 40 minutes, or until the pie shakes loose. Baked pie shells (without the filling) should be baked from 8 to 10 minutes at 400 degrees.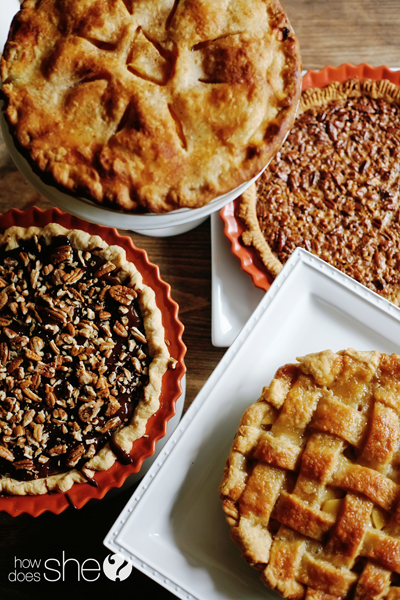

—
Here is the recipe in a quick printable format. Once you have the steps down, it is super easy! Make sure to reference this post with picture tutorial if you have questions.
Penny’s Perfect Pie Crust {Seriously. It’s Perfect}.
Ingredients
- 6 cups of flour (I use all-purpose)
- 3 cups of butter flavored Crisco (No other kind of shortening works as well)
- 3 tsp. Salt
- 1 to 1 1/3 cups water
- *This makes three double pies or six single shell pies.
Instructions
- Measure out the flour into a LARGE bowl first. Place the shortening on the top of the flour, then sprinkle the salt all around. *DO NOT put the water in yet!
- Use your fingers to very delicately sift the shortening and flour mixture together. Gently break up the shortening into a few separate chunks. Scoop your hands deep into the flour. Wiggle your thumbs and fingers back and forth to break the shortening into the flour. DO NOT SMASH the ingredients together. The goal is to get the whole mixture into pea sized chunks. Quit sifting as soon as you get there.
- Add the lesser amount of water on top of the mixture. Gently lift and mix until it is all sticking together. It’s okay to do a little smashing together now. If it is not sticking together, go ahead and put in a little more water until it is adhering well. (I usually end up adding the greater amount of water. It all depends on the moisture content of your flour and your air.)
- Break the dough up into six equal balls. Then roll out your crusts as needed. If you don’t want to make that many pies, just put each ball into a freezer bag, and freeze it ‘til you need it.
- Sprinkle a little flour on your rolling surface and your rolling pin.
- Put your ball of dough in the center and slightly flatten it with your hand.
- With medium pressure, roll evenly away from you two or three times, then roll from one side to another.
- Gently pull your dough off of the surface, re-flour the surface, and flip the dough to the opposite side. Now repeat the process, going one direction (not back and forth) and shaping it into a circle. For a 9" pie try to roll it about 11 1/2" in diameter.
- When your dough is the right size, dust it with a tiny bit of flour, gently fold it in half, and then in fourths. It makes it easy to lift off the mat and put the point into the middle of your pie plate. Then you can unfold it and it will be perfectly centered.
- Press the pie to the shape of the pan, making sure that it is pressed into the edges.
- Using a fork, go all around the inside of the pie poking holes every inch or two so that the pie crust doesn't bubble up while it is cooking.
- Using a knife, cut the crust to the length of my first knuckle (about 1-2" over the edge) creating a perfect circle.
- Fold the edge of the dough underneath, thus doubling the thickness of the dough on the edge of the pan. Slightly flatten the edge with your hand. The edge is a fun place to practice your creativity! Come up with a fun impressive design.
- For double crusted fruit pies: Put a little milk on the top crust and sprinkle dry sugar on top of that. For Meat pies: Use milk and sprinkle on salt.
- Bake on the lower oven rack at 400 degrees for 35 minutes or 40 minutes, or until the pie shakes loose. Baked pie shells (without the filling) should be baked from 8 to 10 minutes at 400 degrees.
Notes
You can make one double crusted pie or two single shell pies by adjusting the ingredient measurements below:
*2 cups of flour (I use all-purpose)
*1 cup of Butter Flavored Crisco (No other kind of shortening works as well)
*1 tsp Salt
*1/3 to not quite ½ cup of water
Yum! I think I will make Pumpkin, Pecan, Jumble Berry, Lemon Meringue, Dutch Apple . . . . . . (you can never have too many pies for the holidays!)
* I wish I could give credit to the woman I got this recipe from. She taught a pie making class that I attended over 20 years ago in Utah. I don’t remember her name. I think she was from Fruit Heights, Utah.
The post Penny’s Perfect Pie Crust {Seriously. It’s Perfect}. appeared first on How Does She.
by Shelley via Home And Garden
















No comments:
Post a Comment